Hello,
I found this nice tutorial,
I wanted to share it with you,
and I plan to try this myself.
I find all of Gary Green's demos (he has several) very useful ,
& hopefully you will too !
It was time for me to buy a new box of Prismacolor Colored Pencils,
of course, you bet, I bought the largest set of 150 colors.
It arrived in a new styled box,
now in a cardboard easel type, instead of the tin.
And something else new, they all came sharpened,
and all put in color order too (that's a change).
Oh, and with 18 new colors !!!
1038 Neon Pink
Also, here is a link
for a fun color pencil contest;
|
You could win a box set of 150 Prismacolor Colored Pencils
I love Prismacolor Pencils !!!
 |
| Ms. Bella kitty resting on my new pencils! |
In honor of my new box set,
Here is Gary Greene:
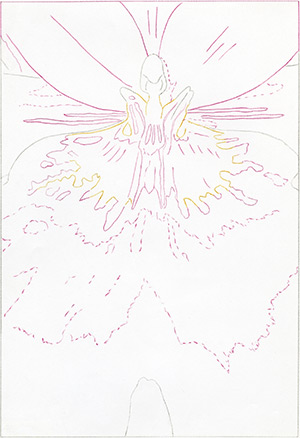
Colored Pencil Demo | An Orchid by Gary Greene
In this demonstration, layering, solvents and burnishing are used to explore the beauty of an orchid close up. The orchid’s center is underpainted with light yellow hues to prevent them from mixing with increasingly stronger colors overlaid on top. The grainy band of magenta pollen across the center of the white petal is layered and dabbed with solvent, and the upper magenta petals are burnished. There’s a little something here for everyone!
Materials
Sanford Prismacolor Colored Pencils;
Cool Grey 20%, 50%, Cream, Crimson Red, French Grey 10%, 30%, Indigo Blue, Magenta, Process Red, Raspberry, Spanish Orange, Sunburst Yellow, Tuscan Red, Warm Grey 90%, & White
Paper surface;
3-ply Bristol vellum, regular surface
Tools;
Bestine rubber cement thinner or equivalent solvent
Cotton swabs, Medium and small round watercolor brushes & a Colorless blender pencil
1 The Layout
After my graphite drawing was complete, I used Prismacolor Verithins (hard colored pencils) of the appropriate color (outline a green object with a green pencil, etc.), to redraw the outlines, using the lighter color when two or more areas bordered one another. I placed the colored pencil outlines adjacent to the graphite lines so I could carefully remove the graphite with a kneaded eraser. At every stage of the layout or line drawing process, sharp pencils, light pressure and light lines are a must. If too much pressure is applied, lines will be impressed in the paper surface and will become visible when color is added.
2 Underpaint the Yellow Center
Layer the darker yellow areas in the center of the orchid with Spanish orange, and the lighter area with sunburst yellow
3 Underpaint with Magenta
Lightly layer the center with magenta and Spanish orange, then blend them together with a dry cotton swab
4 Paint the Center
Apply Bestine with a small brush using light, long strokes to the magenta/Spanish orange areas in the center until thoroughly blended. Do not mix with lighter yellow areas. Dab Bestine on the magenta areas with a small brush, then layer magenta spots. Re-layer the magenta/Spanish orange areas with magenta, and re-apply Bestine with a small brush. Burnish the magenta/Spanish orange areas with Spanish orange, the lighter yellow areas with canary yellow. Then burnish all but the magenta areas with a colorless blender pencil.
5 Layer the Lower Petals
Layer variegations on the lower petals with magenta.
6 Complete the Lower Petals
Dab Bestine with a medium round brush to the variegations, layering the darker areas with raspberry and magenta.
7 Complete the Details and Layer the Upper Petals
Draw the thin cast shadows on the orchid’s left side with cool gray 20% and on the right side with cool gray 50% and 20%. Layer the variegations on the upper white petals with raspberry and magenta. Then dab with Bestine, using a medium round brush. Layer the darkest values of the white pistil with French gray 30%. Then burnish with French gray 10%. Layer the white pistil area with French gray 10% and cream. Then burnish with white. Layer the darkest values and shadows of the upper petals with Tuscan red, the midvalues with raspberry and crimson red, and the lightest values with magenta and process red.
8 Burnish the Upper Petals
Burnish the upper petals with white, except for the darkest values.
9 Complete the Upper Petals
Layer the right and left upper petals with Tuscan red (darkest areas only), raspberry, magenta and crimson red. Then layer the center upper petal with raspberry, magenta and crimson red. Burnish with a colorless blender pencil until the entire paper surface is covered.
Finish With the Background
Layer the dark background areas with indigo blue and Tuscan red. Then burnish with warm gray 90%.
******
Click here for the original source link: